Three ways to build a layer
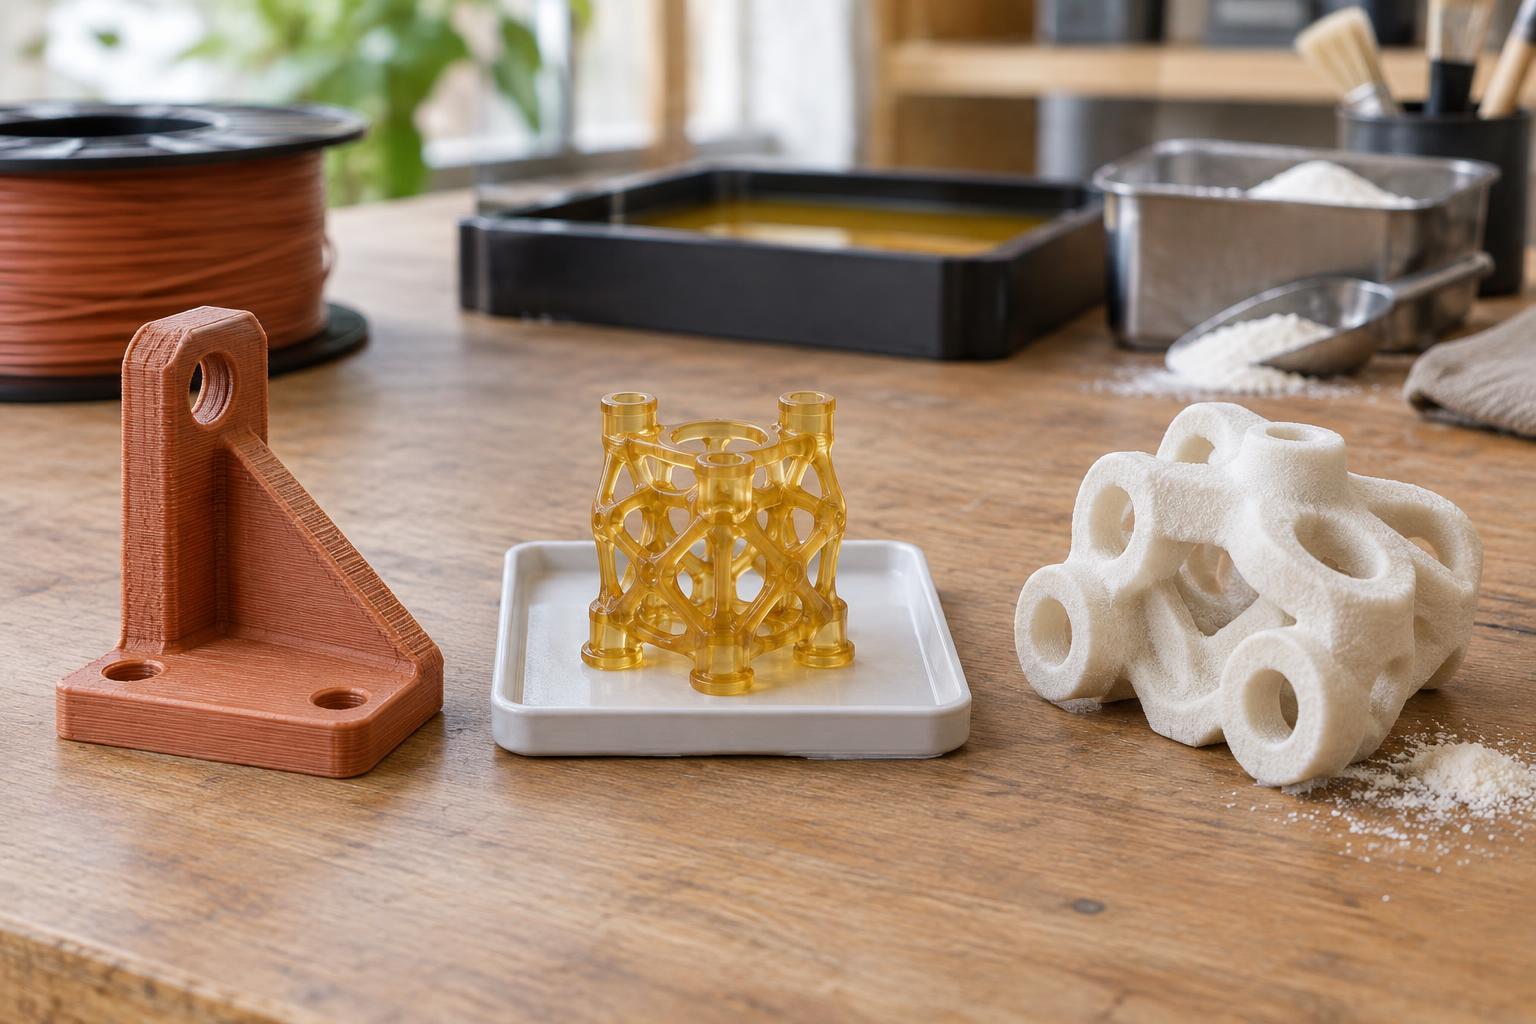
Fused deposition modeling, or FDM, pushes heated thermoplastic through a nozzle and lays it down in paths. Each new layer bonds to the one below as it cools. The method is accessible and well suited to quick prototypes, fixtures, and parts whose visible layer lines are acceptable. The path of the nozzle matters: a part can behave differently depending on how it is oriented on the build plate.
Stereolithography, or SLA, uses light to cure selected areas of liquid resin. Its fine features and relatively smooth surfaces make it useful for detailed models, small enclosures, and parts intended to be inspected closely. Selective laser sintering, or SLS, fuses regions of a polymer powder bed. Surrounding powder supports the part during printing, allowing shapes that would be difficult to build without supports in FDM or SLA.
These names describe process families, not guaranteed levels of quality. Machine settings, material choice, part design, and finishing can change the outcome substantially.
Strength depends on direction and material
For an FDM part, the bond between layers is often more vulnerable than the material along a printed path. A bracket printed flat may therefore respond differently to a load than the same bracket printed upright. Walls, infill, and the number of outer paths also affect performance. When a part must carry a load, orientation should be considered alongside its shape rather than left until the print is prepared.
SLA can reproduce thin features, but detail should not be mistaken for toughness. Some cured resins are comparatively brittle; others are formulated for flexibility or impact resistance. Resin selection and post-curing influence the finished part, so a property listed for one resin should not be assumed for another.
SLS polymer parts can offer a useful balance of strength and geometric freedom, though their properties are not identical in every direction or across all materials and machines. None of these processes automatically produces a part suitable for repeated loading, heat, or outdoor exposure. For a demanding use, test specimens made with the intended material, orientation, settings, and finishing steps.
Surface, accuracy, and design freedom
FDM commonly leaves visible layer lines, especially on sloped surfaces. Overhangs may need removable supports, which can mark the areas they touch. Designers can reduce that work by using self-supporting angles, splitting a shape into printable pieces, or placing less important faces against the supports. FDM is often a sensible choice when function matters more than a uniform finish.
SLA generally captures small details and smooth contours well, but its parts still need support planning. Supports leave contact points, and resin trapped inside hollow features needs a route out. Washing and curing are part of the production workflow, not optional details to ignore when comparing a finished SLA part with a fresh print from another machine.
SLS does not normally require dedicated support structures, which helps with nested shapes, internal passages, and batches of separate parts. It does require a way to remove loose powder from cavities. Its surfaces often have a grainy texture, and dimensions can be affected by cooling and powder removal. For any process, allow for tolerances in mating features and check a test fit before committing to a larger batch.
The work around the printer
Printer time is only one part of production. FDM may involve removing supports and cleaning edges. SLA adds handling, washing, curing, and appropriate care with uncured resin. SLS involves powder handling, cooling, unpacking, and cleaning the parts. The available workspace, equipment, and trained handling practices can therefore matter as much as the advertised build speed.
Material use also differs. FDM supports and failed prints create solid plastic waste; SLA uses liquid resin and washing supplies that need careful handling; SLS relies on a powder supply whose unused portion may be reusable under process-specific limits. A low-waste choice depends on the whole workflow, including failed builds and finishing, rather than on whether a process appears to use supports.
Choosing a process for the job
Start with the part’s purpose. For a fast, inexpensive form check or workshop aid, FDM is often a practical first trial. For a small piece where fine detail or a smooth appearance is central, consider SLA and its finishing requirements. For complex polymer geometry or a batch of parts without support scars, SLS may be worth considering.
Then identify what could make the part fail: a load across layers, a fragile feature, a trapped support or powder pocket, a tight fit, or exposure to heat or chemicals. Choose a candidate material and process, print a representative sample, and inspect it in the conditions that matter. The best method is not the one with the longest list of capabilities; it is the one whose trade-offs the design and workshop can manage.