Why workholding matters
A part that shifts between operations can turn a straightforward process into a sequence of small corrections. A hole may be drilled in a slightly different place, a joint may close unevenly, or an edge may be trimmed at a new angle. Jigs and fixtures reduce that variation by giving each part a defined position relative to the tool or work area.
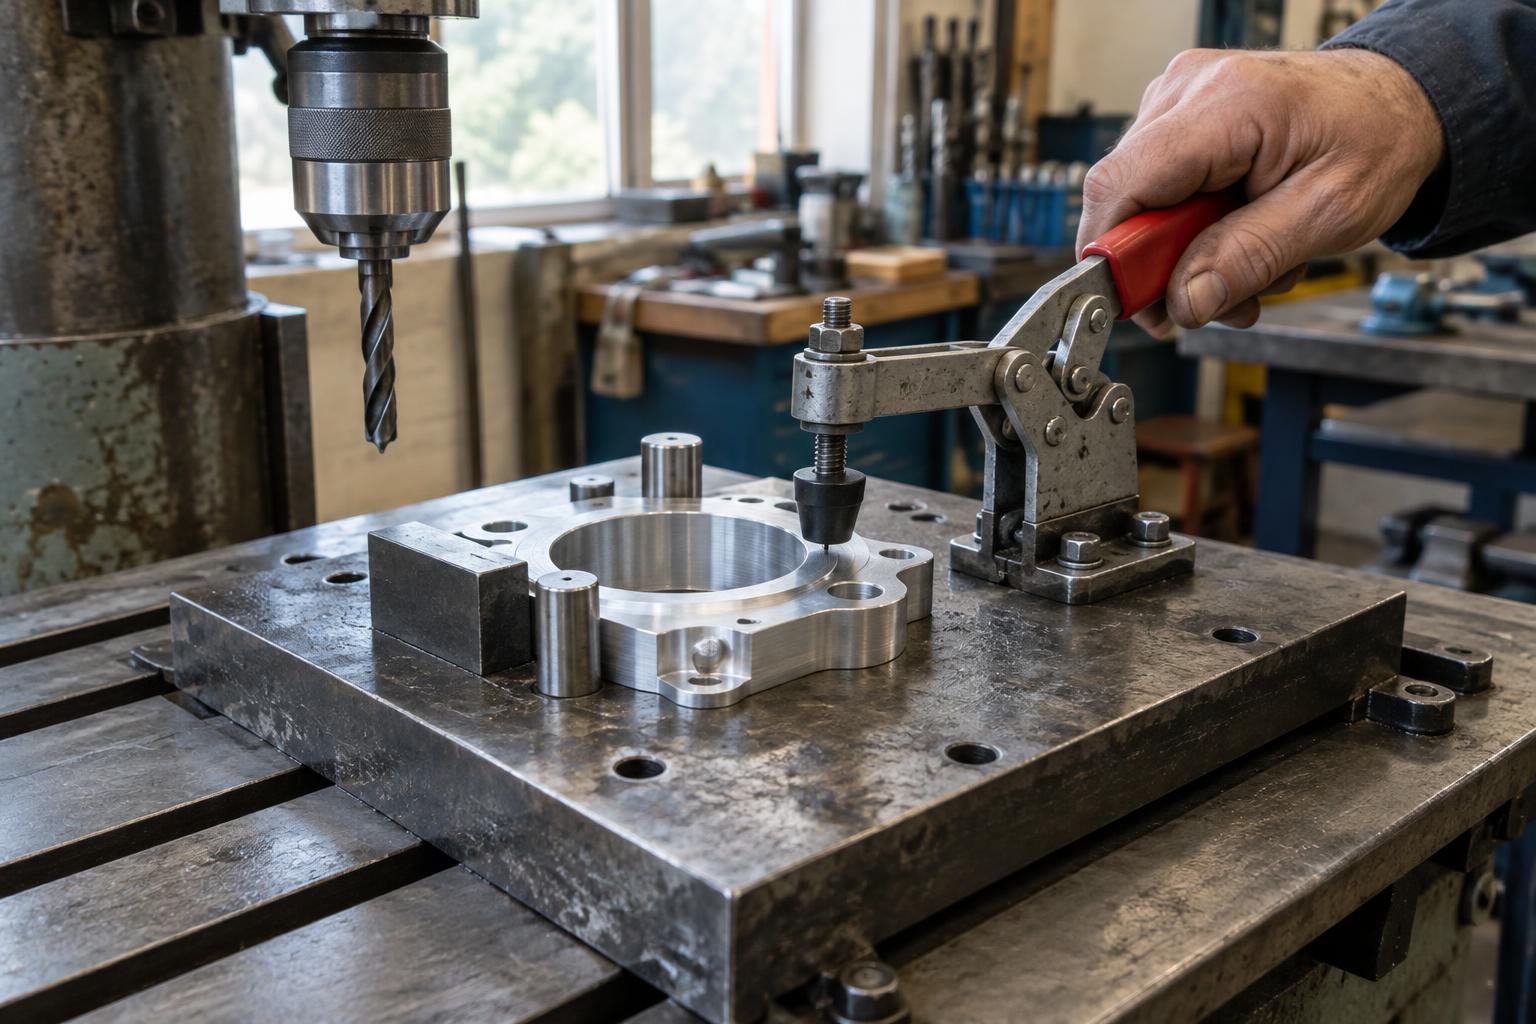
The terms are often used together, but they describe different roles. A fixture locates and holds the workpiece while a tool or machine performs the operation. A jig also guides the tool, as a drill jig does when its bushings establish where the drill enters. In practice, a device may combine both functions. What matters most is being clear about which features it controls and which decisions remain with the operator.
Consistent holding is useful beyond large production runs. A small workshop making a repeat design can use a simple stop, cradle or template to reduce measuring time and make a task easier to teach. The aim is not to remove judgment from the work, but to reserve that judgment for features that benefit from it.
Locate the part before clamping it
Reliable workholding starts with a repeatable reference. Designers often call the chosen reference surfaces datums: faces, edges or features that establish where the part belongs. A flat base might support a panel, a fence might set one edge, and a stop might establish its lengthwise position. These contact points should match the surfaces that matter to the finished operation, rather than whichever surfaces happen to be easiest to reach.
Clamps should secure a part after it has seated against its locators. If a clamp has to drag the workpiece into position, differences in force or surface condition may change the result. Clamp pressure also needs somewhere to go. Thin sheet, soft timber, molded parts and slender metal sections can bend or mark under a force that seems modest at the handle. Pads, wider contact areas and support near the operation can help, provided they do not hide whether the part is properly seated.
A good loading sequence is easy to understand: place the part against its references, confirm contact, then clamp. If operators regularly have to tap, twist or visually guess a part into place, the locating scheme may need revision.
Design around the operation and the operator
A fixture must leave room for the process it supports. Cutting tools need clearance, chips need a way out, and adhesives or finishes should not build up on critical seating surfaces. For assembly, the device may need access for hands, fasteners and inspection. A fixture that holds a part accurately but blocks the next step simply moves the difficulty elsewhere.
Loading and unloading deserve as much attention as the working position. Chamfered entries, visible stops and clamps that open clear of the work can make placement quicker and less ambiguous. Where similar-looking parts have different orientations, an asymmetric locator may help prevent incorrect loading. These choices should not create new pinch points or encourage hands to enter the tool path; workholding must fit the machine’s guards and safe operating procedures.
Material choice depends on wear, forces and the workpiece surface. A temporary assembly aid may be made from plywood or a printed component, while a locating pin exposed to repeated abrasion may call for a more durable material. Replaceable contact pieces can be worthwhile when the main fixture is sound but its working surfaces wear.
Test the method, not just the first part
The first acceptable part does not prove that a fixture will work consistently. Try loading several parts, including ones at the normal limits of material variation, and observe where each one contacts the locators. Check whether different operators follow the same sequence and whether the part remains stable through the operation. If a result changes, look for debris, deflection, uneven stock or a stop that is difficult to reach before assuming the machine setting is at fault.
Simple documentation helps preserve what the test reveals. A setup note can identify the intended references, clamp order, orientation and surfaces that must stay clean. A sample part or inspection check can make the expected result easier to recognize. These aids are especially valuable when a fixture is used intermittently: they reduce the need to reconstruct its purpose each time it comes off the shelf.
Keep repeatability from wearing away
Fixtures change with use. Stops can loosen, pads can compress, drill bushings can wear, and accumulated chips can lift a part away from its reference surface. A brief check before a run can catch these problems: clean the contact points, confirm that fasteners are secure, and test that clamps move freely. Where accuracy is important, periodically compare the output with the intended dimensions rather than relying on the fixture’s appearance.
It is also worth asking whether the device still suits the work. A design change, new stock size or different machine may turn a once-helpful fixture into a source of workarounds. Updating or replacing it can be more sensible than asking operators to compensate at every cycle. The strongest jig or fixture is not necessarily the most elaborate one; it is the one that makes the correct position clear, holds it without damaging the part, and remains dependable in everyday use.